Info
You will see how to configure an item previously created on the Info section.
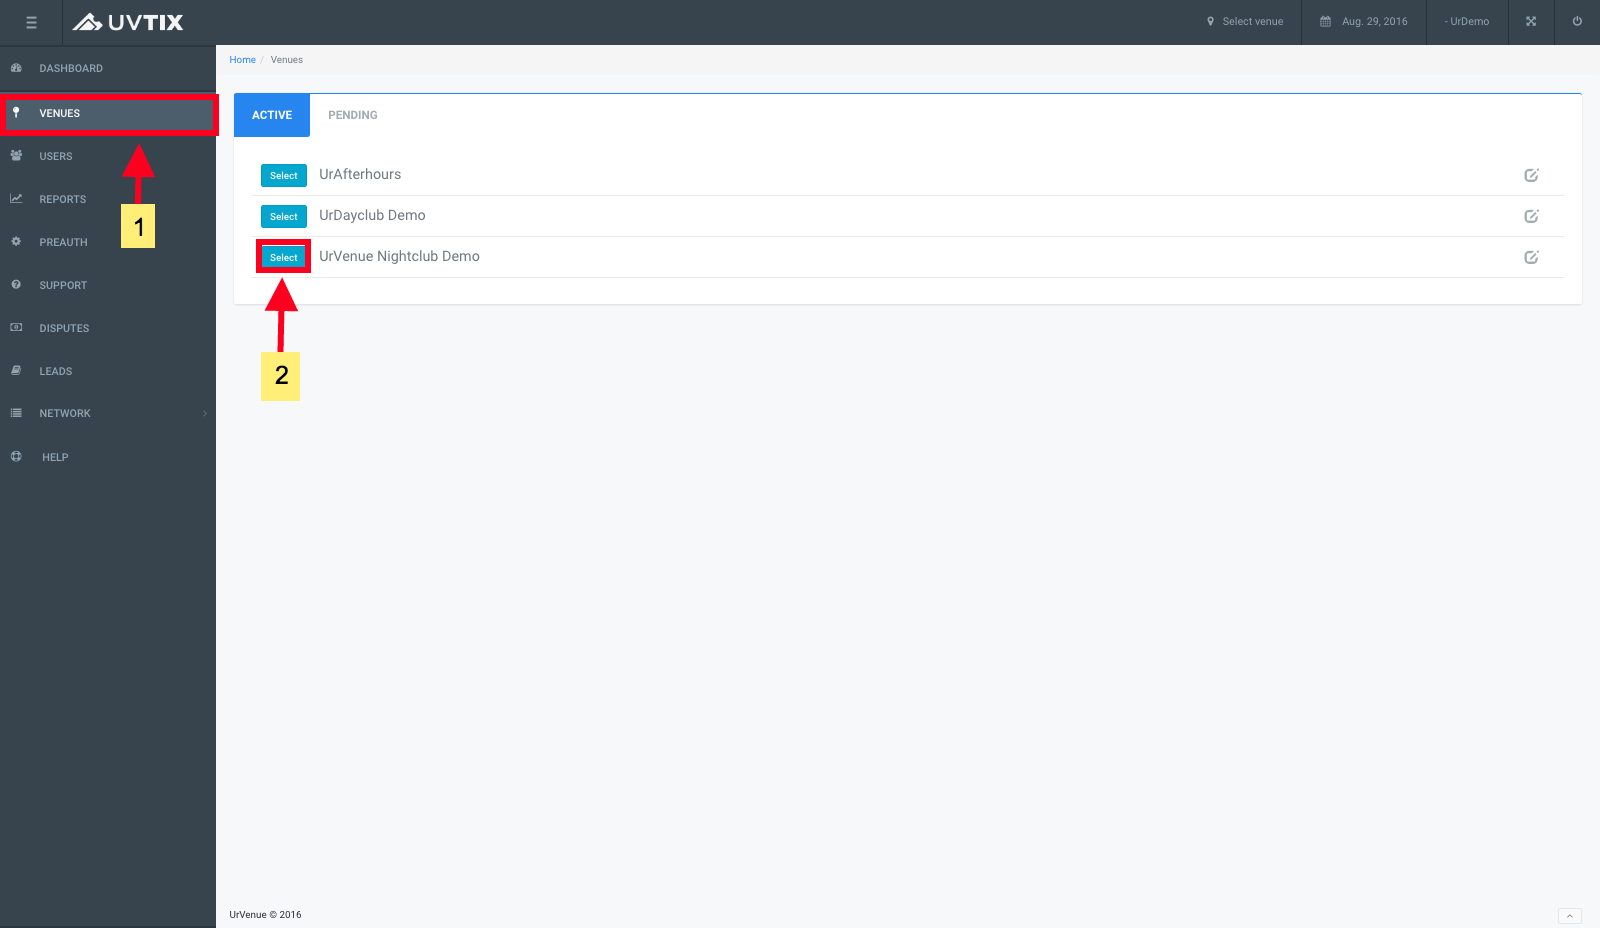
Once on Uvtix please click on:
- Venues
- Then choose the venue we will be focusing on.
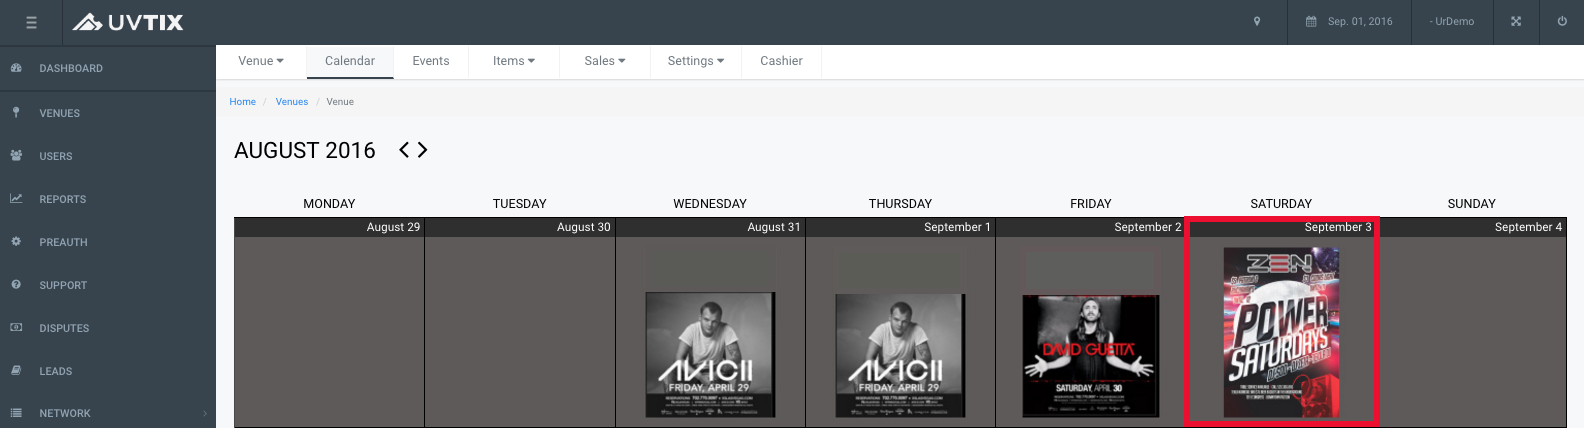
Please select the date we will be working on.
Click on the green icon with the word Edit from one of the items.
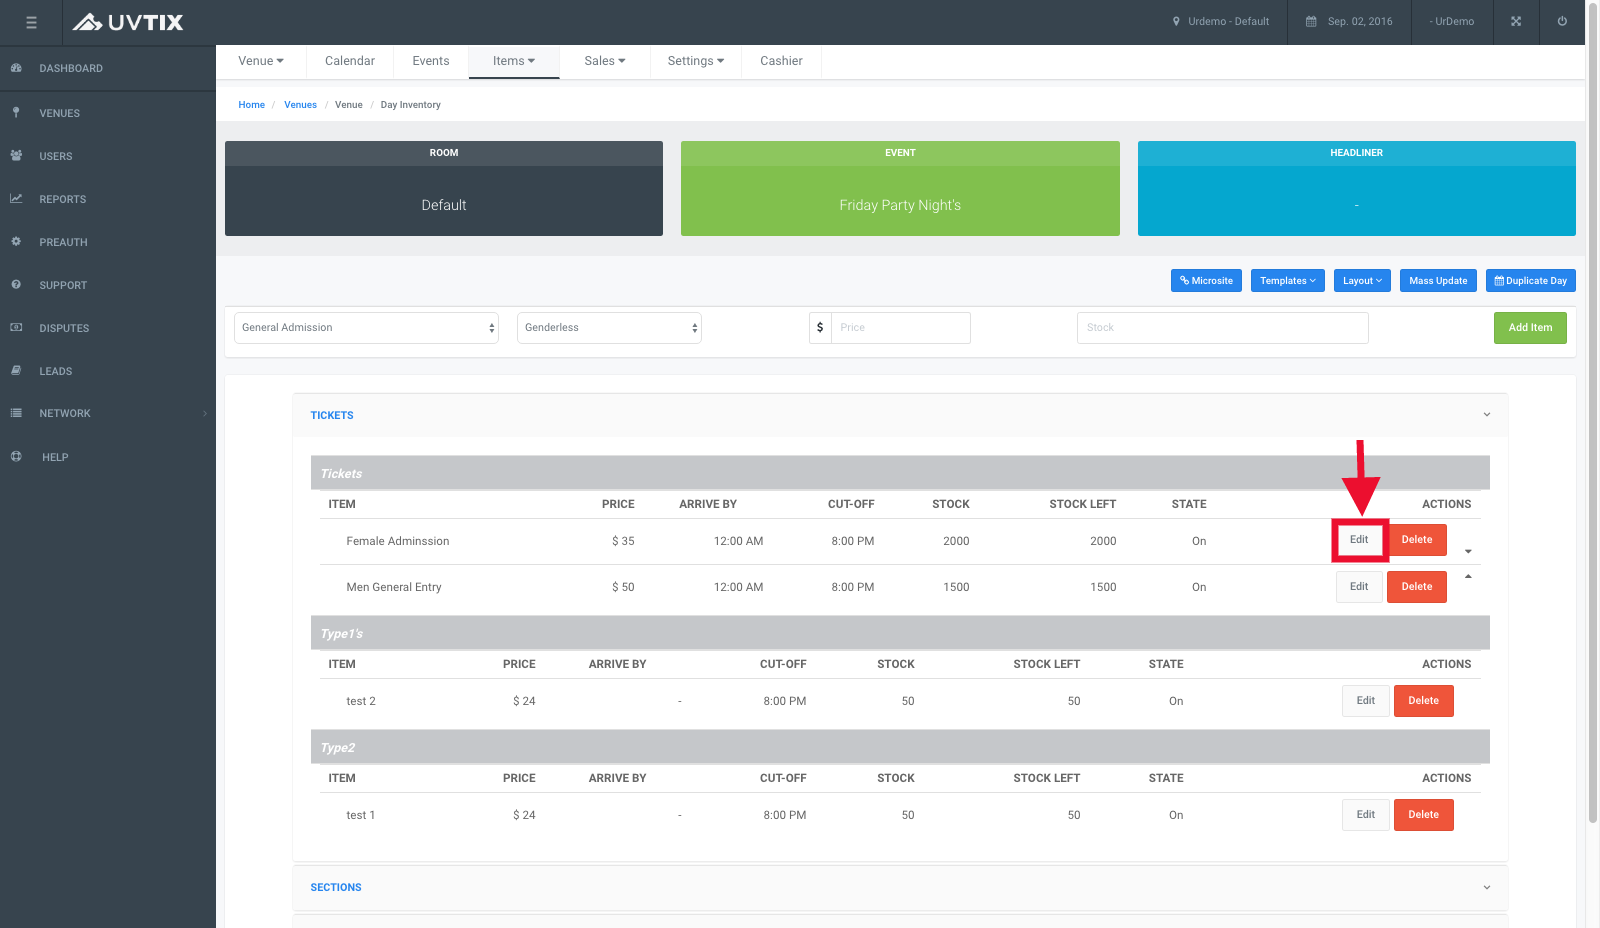
We will now see the following pop up screen for the Info tab.
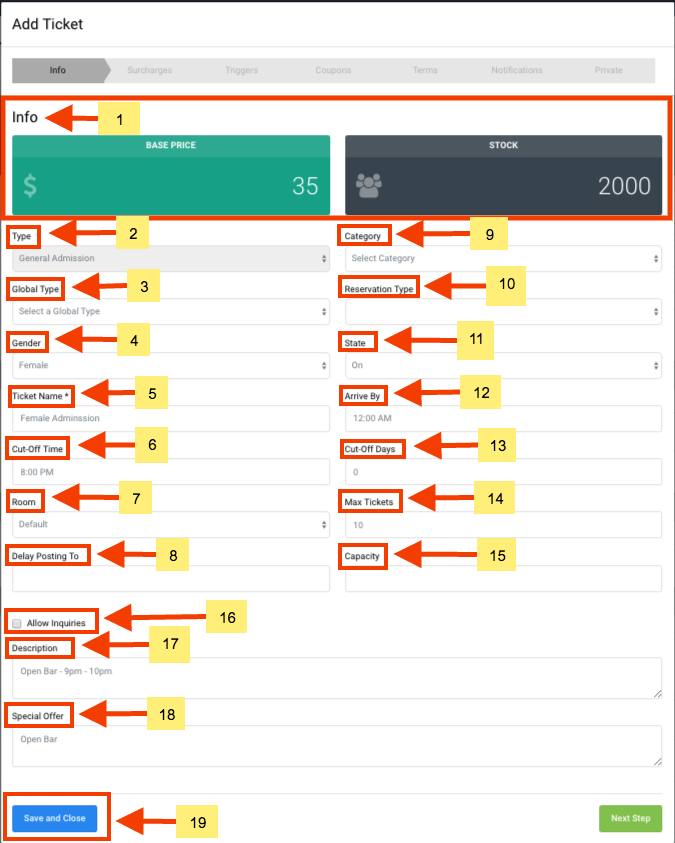
- Info: This is where you will see the Base Price and the Stock for this specific item.
- Base Price: This is where you will add or modify your base price, the price should include the percentage of sales tax, LET tax and proccesing fees, in the case you are trying to modify a reservation item try to include the service fee, server gratuity etc.
- Stock: The stock is the number of items available for sale/reservation for your venue.
- Type: When an item has already been created this option is not available, but here you will be able to see what type of item you are configuring.
- Global Type:
- Gender: On this section you will be able to select if your ticket will be for a secific gender (Male, Female or genderless), in this case we are modifying the female admission ticket, we will leave it as it is.
- Ticket Name: This is where you will name the item ticket, in this case since we are modifying the female admission we will leave it as it is.
- Cut-Off Time: This is to configure the time the ticket sale will no longer be available for sale online.
- Room: Here you will be able to choose the room the event will take place, this is for venues that might have more than one event in one day for a venue, typically a day time event, then a night time event for the same venue.
- Delay Posting To: Here you will be able to delay the posting of the event on the calendar, once you click on this option you will see a small calendar, you will be able to chose the date and time of when you want your event to be visible to the public.

- Category:
- Reservation Type:
-
State: Here you will see a dropdown list of the options available:
- Display Sold Out: With this option set the customer will see that this particular item will be sold out on the website.
- Not released: With this option the customer will see a message regarding the section or table that reservations will not be released.
- Inquire: Here the customer will be only allowed to make an inquiry via email for the item, this is more related to tables reservations.
- Sold: This option is for table reservations, if the venue is handled per individual items online, this message can be used to state that a specific table has already been sold.
- Pending: This option is more for table reservation, with this option you can leave a section or particular table as pending if you have not yet decided the price or promotion you might have for this, you can still receive table inquiries.
- On: This option will allow the customer to buy, reserve a table or ticket without any issue.
- Off: This option will not allow a customer to make a purchase, table inquiry, it does not allow the item to appear on the website.
- Arrive By: This option allows you to add the time the customer needs to arrive by at the venue to gain entry.
- Cut/Off Days: This feature is linked to the Cut/Off Time with this you can select how many days before the event items will no longer be available for sale online.
- Max Tickets: Here you can select how many tickets can be purchased in a single transaction, keep in mind that this feature will only affect the item we are configurating, in this case this will be the max number of tickets for female admission available for purchase in a single transaction.
- Capacity: This option is more used for table reservations, here you can set up the number of guests permitted for a particular item.
- Allow Inquiries: This option is for table reservations, this will enable customers to make inquires aside from a direct reservation. Here customers can ask questions or maybe even receive a quote for a specific item.
- Description: Here you will be able to input a description of the item, this description will be public to customers.
- Special Offer: In this area you will be able to input a special offer for the item you are configurating, this will be viewed by internal staff.
- Save and Close: Here is where you will save all prior modifications to the item, always remember to save all changes.